DIY Gluten-Free Baking Mixes: Save Time and Money (2026)

Ever gazed longingly at those ready-made gluten-free baking mixes in the store? They promise speed, convenience, and sometimes, even a little magic. But then you spot the price tag, right? Ouch. And the ingredient list? Sometimes it’s longer than your arm, full of things you can’t pronounce or simply don’t want in your yummy treats.
I hear you. I’ve been there. We all want easy, delicious gluten-free baking without breaking the bank or sacrificing quality. So, what’s a passionate GF baker to do? We get savvy, my friend! Today, we’re diving into the wonderful world of DIY gluten-free baking mixes. It’s a game-changer, trust me. Not only will you save precious pennies and time, but you’ll also gain complete control over what goes into your family’s delightful dinners and sweet indulgences. Think of it as your secret weapon in the kitchen, a pantry superhero ready to swoop in and save the day. If you’re ready to truly master your GF kitchen, you’ll find even more wisdom in our comprehensive guide to Gluten-Free Baking Essentials.
Why DIY GF Baking Mixes Are Your New Best Friend
Let’s be real, going gluten-free can feel like a culinary scavenger hunt sometimes. Pre-made mixes are often expensive, with limited options. Crafting your own blends, though? It’s pure genius. Here’s why:
- Save a Bundle, Literally: Buying individual gluten-free flours and binders in bulk almost always costs less than buying pre-mixed packets. Those markups? You’re ditching them. Your wallet will thank you.
- Ingredient Control is Power: Allergies, sugar sensitivities, or just a desire for cleaner eating. When you make your own mix, you know exactly what’s inside. No hidden starches, no strange gums you don’t recognize, and definitely no surprises.
- Freshness You Can Taste: Ever notice how some store-bought mixes can taste a little… stale? When you blend your own, your ingredients are fresh. And that means a fresher, more vibrant flavor in your final baked goods. It’s like picking produce straight from the garden versus buying it pre-packaged.
- Customize to Your Heart’s Content: Do you prefer a slightly denser cookie? A lighter, fluffier pancake? You can tweak your flour ratios to get the exact texture you crave. This is where the magic truly happens, turning you into a kitchen alchemist.
- Weeknight Whiz: Imagine this: Tuesday night, craving pancakes. Instead of measuring out five different flours, baking powder, and salt, you just scoop from your pre-made mix. Add wet ingredients. Boom! Dinner is served. Time saved is sanity saved.
The Science of GF Baking, Simplified
Alright, let’s peel back the curtain a tiny bit. Why are gluten-free flours so different from wheat flour? Basically, wheat flour has gluten, which is a protein network that gives elasticity and structure. Without it, things can get crumbly or dense. That’s why we need a blend of different GF flours, each bringing its own special superpower to the party.
Some flours, like rice flour, provide structure. Others, like tapioca starch, bring chewiness and crispness. And then there are binders, like xanthan gum, which act like the glue that gluten usually provides. They help hold everything together, preventing your muffins from falling apart. If you want to dive deeper into how these binders work, particularly Xanthan Gum vs. Guar Gum: Choosing the Right Binder for GF Baking, we have a whole post dedicated to it!
Your Essential GF Pantry Stock-Up for DIY Mixes
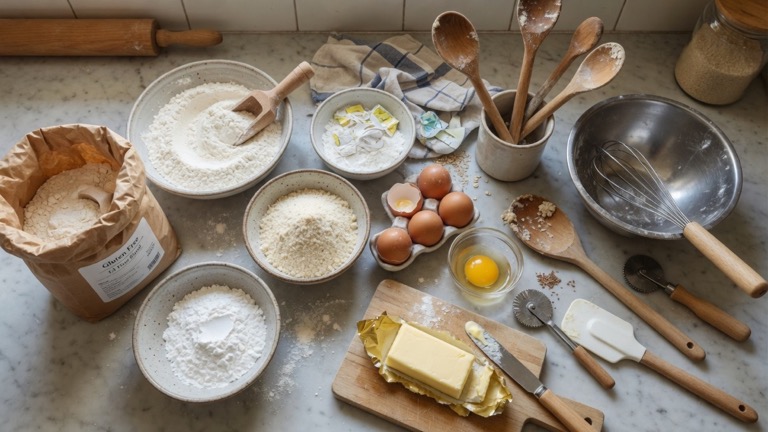
Before you start blending, make sure your pantry is ready for action. Think of these as your building blocks:
The Flour Foundation (Pick a few, not necessarily all!)
- White Rice Flour & Brown Rice Flour: These are GF staples. White rice flour is neutral and light; brown rice flour adds a nuttier flavor and more fiber.
- Sweet Rice Flour (Glutinous Rice Flour): Don’t let the name fool you, it’s gluten-free! It’s super starchy, fantastic for chewiness and binding.
- Sorghum Flour: A wonderful, mildly sweet, and earthy flour. Great for cakes and quick breads.
- Millet Flour: Offers a slightly nutty taste and is nutrient-rich.
- Oat Flour (Certified GF): Adds a lovely softness and flavor. Always ensure it’s certified GF to avoid cross-contamination.
- Tapioca Starch/Flour: Brings elasticity, chewiness, and a lovely crisp crust.
- Potato Starch: Lightens texture and adds moisture. Different from potato flour, which is heavier.
- Arrowroot Starch: Similar to tapioca, a great thickener and lightener.
- Almond Flour & Coconut Flour: These are lower-carb, higher-protein flours that absorb a lot of liquid. They behave differently, so use them in specific blends or recipes.
The Binder Brigade
- Xanthan Gum: Your go-to for elasticity and structure in most baked goods. A little goes a long way.
- Psyllium Husk Powder: Another excellent binder, especially good for bread-like textures, adding structure and fiber.
Leavening & Sweetness
- Baking Soda & Baking Powder: Essential for rise and fluffiness. Check their expiration dates!
- Salt: A flavor enhancer, always needed.
- Sugar (or your preferred sweetener): Granulated sugar is common, but you can explore options like coconut sugar, maple sugar, or even a touch of erythritol if you’re mindful of your sweet intake. We talk all about the various options in our guide to The Best Gluten-Free Sweeteners for Healthier Baking.
Your Go-To DIY GF Baking Mix Formulas
Here are a few versatile starter mixes. Remember, these are jumping-off points! Feel free to adjust based on your preferences. For a much deeper dive into the world of flour ratios, check out The Ultimate Guide to Gluten-Free Flour Blends.
1. All-Purpose GF Flour Blend (Great for cookies, muffins, quick breads)
This is your workhorse mix. Use it as a 1:1 substitute for many recipes that call for “all-purpose GF flour.”
- 2 cups brown rice flour
- 1 cup white rice flour
- 1 cup tapioca starch
- 1 cup potato starch (not potato flour!)
- 2 teaspoons xanthan gum
Instructions: Whisk everything together thoroughly. Store in an airtight container.
2. GF Pancake & Waffle Mix
Fluffy, golden perfection is just moments away!
- 2 cups all-purpose GF flour blend (from above)
- 1 cup certified GF oat flour
- 1/2 cup sweet rice flour
- 1/4 cup granulated sugar (or preferred sweetener)
- 1 tablespoon baking powder
- 1 teaspoon baking soda
- 1/2 teaspoon salt
- 1 teaspoon xanthan gum (if your all-purpose blend doesn’t already contain it, or if you want extra binding)
Instructions: Mix all dry ingredients well. Store. When ready to use, for about 12 pancakes, whisk 2 cups of your mix with 2 eggs, 1 ½ cups milk (dairy or non-dairy), and 2 tablespoons melted butter or oil.
3. Light & Airy GF Cake Mix (For cakes, cupcakes)
This blend creates a tender crumb, perfect for those celebratory bakes.
- 2 cups white rice flour
- 1 cup sorghum flour
- 1 cup tapioca starch
- 1/2 cup potato starch
- 1 tablespoon baking powder
- 1/2 teaspoon xanthan gum
- 1/2 teaspoon salt
Instructions: Whisk all ingredients. Store in a cool, dark place. When a recipe calls for GF cake flour, use this!
How to Make & Store Your DIY Mixes
Making your mixes is simple, but a few key steps ensure success:
- Gather Your Tools: You’ll need large mixing bowls, a good whisk (or a stand mixer with a whisk attachment for larger batches), and airtight storage containers.
- Measure Accurately: This is crucial in GF baking. I highly recommend using a kitchen scale for flour, especially if you want consistent results. Fluff your flours before scooping and leveling if using measuring cups.
- Whisk, Whisk, Whisk: Mix everything together thoroughly. Seriously, spend a few minutes on this. You want the xanthan gum and starches evenly distributed, or you might end up with gummy spots or crumbly patches in your baking.
- Store It Right: Airtight containers (glass jars, sturdy plastic containers, or heavy-duty zip-top bags) are your best friends. Label clearly with the mix type and the date you made it. Keep them in a cool, dark pantry. For flours like oat, almond, or brown rice flour, which can go rancid faster, consider storing your mixed blends in the fridge or freezer if you won’t use them within a month or two.
- Expiration Dates Matter: Flours generally have a shelf life of 6-12 months. Binders like xanthan gum last longer. Always check individual ingredient dates before mixing.
Pro Tip: When using your DIY mix in a recipe that calls for a commercial GF blend, pay attention to whether that commercial blend already includes xanthan gum. If yours does and the recipe calls for more, you might need to reduce or omit the extra xanthan gum to avoid a gummy texture. A little research on the commercial blend (a quick Google search can help) will save you headaches.
Beyond the Basics: Tips for DIY Mix Mastery
- Batch It Up: Don’t just make enough for one batch of cookies. Make a generous quantity of your favorite mix. Future you, in a hurry, will be so grateful.
- Label Like a Pro: Beyond the mix name and date, add a note about what the mix is best for. Maybe even jot down the base recipe for a quick pancake or muffin!
- Experiment Fearlessly: Once you’re comfortable, start swapping flours. Try a little more sorghum for a nuttier flavor. A bit more tapioca for extra chew. Your taste buds are your best guide! For example, King Arthur Baking offers a popular GF flour blend recipe that you can adapt.
- Consider Protein Flours: For extra nutrition, you can occasionally add a small amount (like 1/4 cup per 5 cups of mix) of a protein flour such as almond, coconut, or even a GF soy flour, but be aware they absorb liquids differently.
- Don’t Be Afraid of the “Why”: If something isn’t quite right with your bake, think about the flours. Too crumbly? Maybe more binder or a stickier starch is needed. Too gummy? Perhaps too much starch or gum. It’s all part of the learning process! For a more scientific perspective on flour properties, check out resources like Wikipedia’s article on Gluten-free flour.
Whip Up Wonderfulness with Your New Mixes!
Now that you’re armed with your custom DIY gluten-free baking mixes, the world is your oyster. Or, rather, your cupcake! Imagine grabbing your pancake mix, adding eggs and milk, and having breakfast ready in minutes. Or pulling out your all-purpose blend to whip up a batch of chocolate chip cookies after school. The possibilities are truly endless.
This isn’t just about saving time and money, though those are huge perks. This is about taking control of your gluten-free journey. It’s about demystifying baking, boosting your confidence, and proving that delicious, wholesome, GF treats are absolutely within your reach. So, go forth, mix with gusto, and bake with joy!
Happy mixing, my GF friends!