I Reorganized My Gluten-Free Kitchen for Smarter Shopping—Here’s What Worked

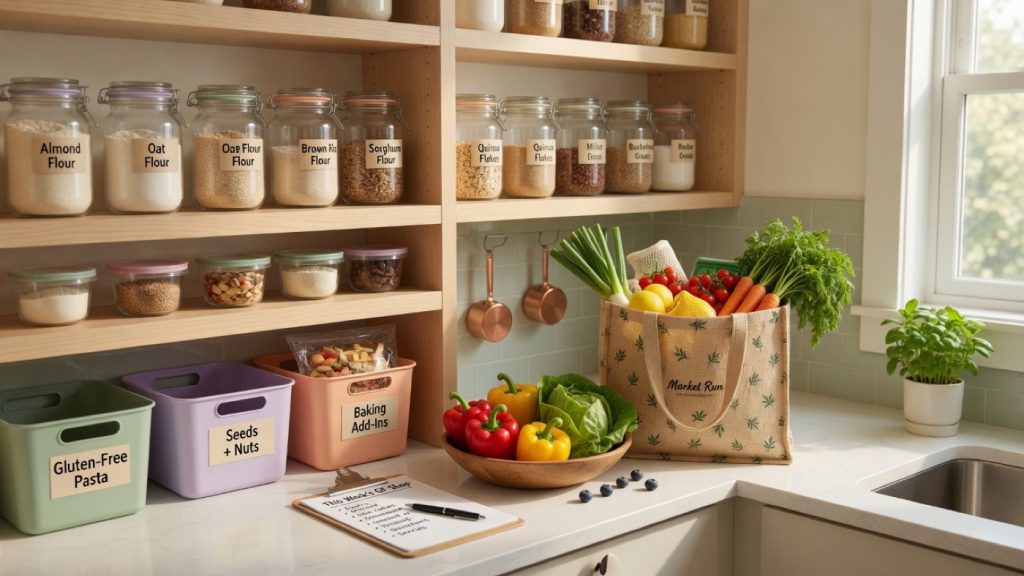
I spent one weekend reorganizing my gluten-free kitchen so grocery runs would stop feeling like a scavenger hunt. Here’s my honest review—what worked, what flopped, and what I’d do again.
As someone who cooks gluten-free for a family most nights of the week, I know the “we’re out of xanthan gum” moment usually hits at 5:47 p.m., not during a calm Sunday meal plan. That being said, it took me a while to believe that organizing the kitchen would actually make gluten-free shopping easier—not just prettier for Instagram.
I like a tidy shelf as much as the next person, but liking neat jars doesn’t mean I trusted the productivity influencers who swear a label maker will change your life. Could sorting flours and color-coding boards really cut my store time, stop duplicate buys, and lower the cross-contamination stress? I was determined to try.
What “Organizing for Efficient Shopping” Actually Means
I couldn’t find one universal system that every GF household uses (because every kitchen and every family is different). After piecing together advice from meal-planning guides, pantry lists, and a few too many late-night “before and after” reels, the basics looked like this:
- One dedicated gluten-free zone (or clearly marked shelves) so “safe” food isn’t mixed with gluten products
- Like-with-like pantry groups — flours, pastas, snacks, baking binders, breakfast staples
- Clear containers + labels so you see quantities at a glance
- A living shopping list fed by empty jars and a weekly meal plan, not by panic at the store
Some people go full Marie Kondo. Others just put the GF crackers on a higher shelf. I wanted something in the middle: safe enough for celiac-level caution in our house, realistic enough that I’d still maintain it on a Wednesday.
How I Actually Reorganized (Not the Perfect Version)
As a busy human, I knew I didn’t want to spend four days alphabetizing spices. So I did what time-strapped people do: I problem-solved with a timer and a trash bag.
Saturday morning, two hours. I emptied the main pantry onto the counter (yes, it looked chaotic). Everything gluten-free went left. Everything shared or gluten-containing went right. Anything expired or mystery-bagged went straight out. If you share a kitchen, this is also where you face the truth about who keeps eating the last certified GF oats.
Then I set zones:
- Top shelf / closed bin: baking staples (flour blends, starches, xanthan, chocolate chips I hide from myself)
- Eye-level: weeknight workhorses — pasta, rice, quinoa, sauces we’ve verified as GF
- Kid zone: snacks in clear bins so nobody “accidentally” opens the wrong crackers
- Spill risk / open bags: into airtight containers the same day, labeled with the product name and the “use by” from the original bag
In the fridge, I claimed one drawer and one door shelf as GF-only for leftovers and condiments that get double-dipped. In the freezer, I used painter’s tape labels on bags of homemade stock and leftover GF bread ends for crumbs. Nothing fancy—just visible.
For shopping, I taped a small notepad inside the pantry door. Rule: if you finish it or it dips below “one more meal,” write it down before you close the door. That list + our weekly meal plan became the only list I took to the store.
My Honest Review: Did It Make Shopping Better?
Unlike the glossy reorg videos online—where every jar matches and nobody has a half-used bag of chickpea flour—my kitchen still looks lived-in. Thanks to the zones, though, I didn’t have to dig. That alone changed my last three grocery runs.
What worked:
- Fewer double-buys. I stopped grabbing “backup” pasta when two boxes were already hiding behind the cereal.
- Faster label checks at the store. When you know you’re only shopping gaps (not rebuilding the whole pantry from memory), you can slow down and read labels properly—huge if you’re still learning hidden gluten ingredients.
- Safer shared-kitchen habits. Color-coded boards and a GF-only drawer didn’t make us perfect, but they made the right choice the easy choice.
- Meal planning finally stuck. Seeing empty spots made “what’s for dinner?” less abstract. I built lists the way I outline in our shopping lists for a week guide—except now the list started from real empty jars.
What didn’t:
- Over-labeling. I labeled three jars “flour” on day one. Useless. You need the type (rice, almond, 1:1 blend) or you’ll bake with the wrong one. Ask me how I know.
- A system too precious to maintain. The Pinterest-perfect spice riser lasted four days. Simple bins won.
- Ignoring the freezer. Day-one me only did the pantry. Week-two me found three mystery containers and one sad tortilla. Do freezer and fridge the same weekend if you can.
I don’t see myself reorganizing from zero every month—but I also wouldn’t go back to “shove it wherever it fits.” Most of my complaints were about my own overcomplication, not the core idea.
My advice? Don’t wait for matching containers. Start with one GF zone, clear visibility, and a door list. If you only do that, shopping gets easier. If you want the fuller system, here’s the version I’d actually tell a friend to follow.
How to Organize Your Gluten-Free Kitchen for Efficient Shopping
Time: 1–3 hours for a first pass | Best for: shared or solo GF kitchens | Gear: clear bins or jars, tape or labels, a notepad, trash bag
What you need
- Clear containers or bins (dollar-store is fine)
- Labels or painter’s tape + marker
- Optional: color-coded cutting boards / towels for GF vs gluten
- A notepad or notes app list titled “GF to buy”
- 30 minutes with your actual meal plan for the week
Step-by-step
- Empty and sort. Pull pantry items out. Make three piles: gluten-free keepers, gluten/shared, toss/donate. When in doubt on a sauce or spice blend, check the label again or set it aside for a proper certification and label check later—don’t guess into the GF zone.
- Claim a dedicated zone. One shelf, one cabinet, or sealed bins. If you share the kitchen, this is non-negotiable for peace of mind. Pair it with the habits in our cross-contamination kitchen guide.
- Group like with like. Flours and starches together. Pasta and grains together. Breakfast, snacks, baking extras. Put daily-use items at eye level.
- Decant only what you use weekly. Transfer open bags into clear containers. Label with name + date. Leave backup boxes sealed in the back so you’re not washing twelve jars for food you open twice a year.
- Set a fridge/freezer rule. One drawer or shelf for GF leftovers and condiments. Tape labels on freezer bags the day they go in.
- Build the shopping loop. Note empty or low items on the door list. Once a week, combine that list with your meal plan before you leave home. That’s the whole efficiency trick—shopping from reality, not from memory.
- Do a 10-minute Sunday reset. Wipe the GF zone, face labels forward, move anything that migrated. Small maintenance beats another full reorg.
Optional upgrades (nice, not required)
- Color-code tools (green board = GF only)
- Keep a “first-time ingredients” bin for new flours so experiments don’t mess up your everyday blend shelf
- Stock a short list of frugal pantry staples so sales shopping has a purpose
- Hang a mini version of your can’t-live-without staples list inside the pantry door
Would I Recommend It?
Yes—with realistic expectations. Organizing your gluten-free kitchen won’t make every store trip fun, and it won’t replace learning labels. What it will do is stop the expensive panic buys, make meal planning honest, and give your brain fewer places for gluten risk to hide.
I won’t reorganize every weekend. I will keep the zones, the door list, and the “if it’s low, write it down” rule. That combo made shopping faster and dinner calmer—which, for a GF household, is the whole point.
If you’re building the rest of the system, start here next: Navigating Gluten-Free Shopping, then lock in a simple plan with the beginner’s meal-planning guide.