Ultimate Gluten-Free Chocolate Chip Cookie Recipe (2026)


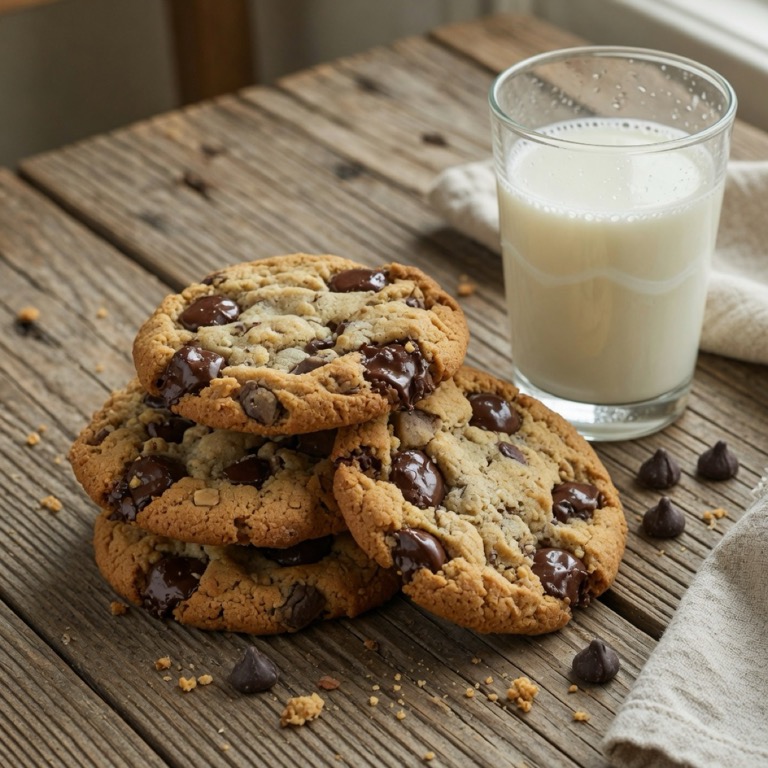
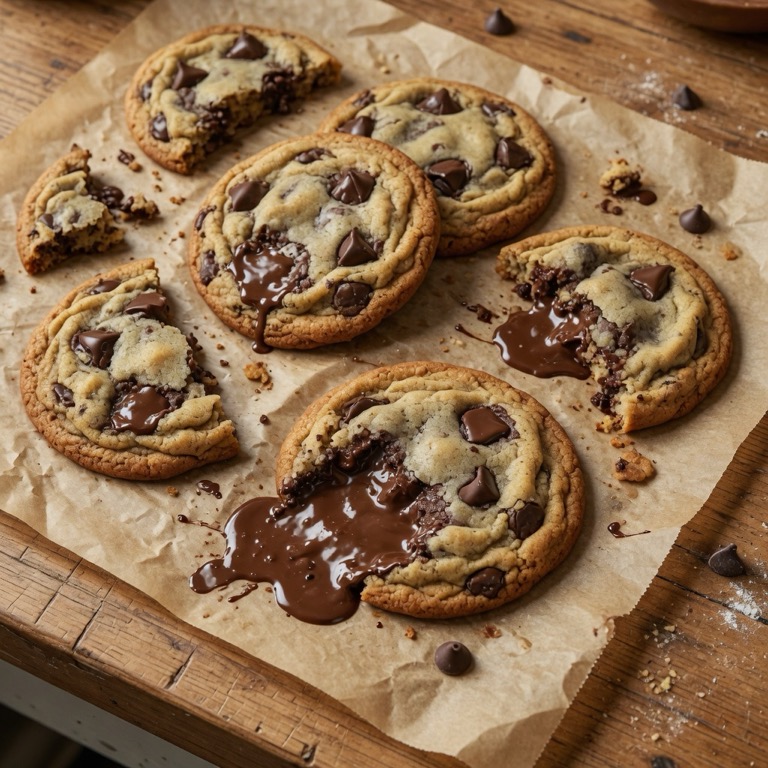
Okay, friends. Let’s talk about the holy grail of baking. That golden-edged, chewy-centered, chocolate-melty dream that every single one of us deserves, whether gluten is our friend or not. I’m talking about the chocolate chip cookie. For years, the GF world felt a bit like a dusty old cookbook, full of recipes that promised the world but delivered dense pucks or crumbly disappointments. Not anymore. I’m here to tell you that the ultimate gluten-free chocolate chip cookie isn’t just a myth; it’s right here, waiting for you. And trust me, once you make these, your kitchen will smell like pure joy, a feeling that, frankly, is essential for a happy life. Consider this your personal invitation to a world where gluten-free baking isn’t just good, it’s Gluten-Free Recipes & Meal Planning perfection.
I know what you’re thinking. “Can a GF cookie *really* stand up to its wheat-filled cousin?” Oh, my sweet friend, it can. And this one? It doesn’t just stand up. It dances, it sings, it practically does a backflip. We’re going to dive deep, but in a totally approachable way, into what makes a truly spectacular GF chocolate chip cookie. It’s not just about swapping flour; it’s about understanding what gluten does and how we can achieve that same incredible texture and flavor without it. We’re talking science, but the delicious kind, like figuring out why a splash of cold water makes a perfect crust. Basically, we’re becoming cookie whisperers.
The Gluten-Free Secret Sauce: Understanding Your Flour Blend
The biggest hurdle in GF baking often comes down to one thing: flour. Gluten, that stretchy protein found in wheat, is like the architect of texture in baked goods. It provides structure, chew, and elasticity. When we take it out, we need to bring in a team of players to mimic its role. A good store-bought gluten-free all-purpose flour blend often does this work for you, combining different flours and starches. Think of it as a carefully crafted symphony where each instrument plays a part.
- Rice Flour (brown or white): Offers structure, a neutral flavor.
- Tapioca Starch (or tapioca flour): This is your elasticity superstar. It brings chewiness.
- Potato Starch: Adds tenderness and moisture.
- Xanthan Gum: A tiny bit of this magic ingredient acts as a binder, standing in for gluten. It stops things from falling apart.
Most reputable GF all-purpose blends already have xanthan gum in them, so check your package. If it doesn’t, you’ll need to add about ½ teaspoon per cup of flour for cookies. This is super important. Without it, your cookies might spread too much or become too crumbly. We want soft, chewy cookies, not a pile of delicious dust!
The Unsung Heroes: Butter, Sugar, and Time
Beyond the flour, a few simple tweaks take these cookies from “good for GF” to “just plain amazing.” These aren’t just ingredients; they’re personality traits for your cookies.
Brown Butter: Your Flavor Gold Mine
First up, brown butter. If you’ve never browned butter before, prepare for a revelation. It’s shockingly simple, yet it adds a depth of nutty, toasted flavor that will make people wonder what your secret is. All you do is melt butter in a light-colored pan over medium heat, swirling occasionally. It will foam, then start to smell nutty, and tiny brown bits will appear at the bottom. As soon as you see those golden-brown flecks, take it off the heat immediately and pour it into a bowl to cool. Don’t let it burn. This concentrated flavor gives your cookies an instant upgrade, like going from a plain t-shirt to a cashmere sweater.
The Perfect Sugar Combo
This recipe uses a specific ratio of brown sugar to white granulated sugar. Why? Brown sugar is moist and slightly acidic, contributing to chewiness and a deeper, almost caramel-like flavor. White sugar helps with crisp edges and spread. Together, they create a balanced cookie that’s both chewy and slightly crisp at the edges. It’s like a delicious give-and-take.
Chill Out, Cookie Dough!
This is probably the most crucial step, and honestly, the hardest for impatient bakers (I see you!). Chilling the dough for at least 24 hours (or even 48!) does wonders. It allows the flour to fully hydrate, preventing a gritty texture. More importantly, it solidifies the butter, which means your cookies will spread less and bake up thicker and chewier. The flavors also get a chance to meld and deepen. It’s like letting a good stew simmer; everything gets better with time. You can even freeze scooped dough balls for future baking adventures, which makes a mid-week cookie treat almost as easy as whipping up some 10 Delicious Gluten-Free Breakfast Smoothies.
The Ultimate Gluten-Free Chocolate Chip Cookie Recipe
Alright, enough talk. Let’s bake some happiness!
Yields: About 18 large cookies
Prep time: 20 minutes
Chill time: 24-48 hours
Bake time: 10-14 minutes
Ingredients:
- 1 cup (2 sticks or 226g) unsalted butter
- 1 ½ cups (300g) packed light brown sugar
- ½ cup (100g) granulated sugar
- 2 large eggs, at room temperature
- 2 teaspoons vanilla extract
- 2 ¼ cups (315g) gluten-free all-purpose flour blend (with xanthan gum, or add ½ tsp)
- 1 teaspoon baking soda
- 1 teaspoon salt (flaky sea salt is even better for finishing!)
- 1 ½ cups (about 250g) chocolate chips or chunks (a mix of milk and dark is divine!)
Instructions:
- Brown the butter: In a light-colored saucepan over medium heat, melt the unsalted butter. Continue to cook, swirling occasionally, until the butter foams, then smells nutty, and brown bits appear at the bottom. This usually takes 5-8 minutes. Immediately pour the browned butter into a large heatproof bowl. Let it cool for about 10-15 minutes, or until it’s slightly warm but no longer sizzling.
- Combine sugars: Add the brown sugar and granulated sugar to the cooled browned butter. Whisk thoroughly until well combined and smooth.
- Add wet ingredients: Whisk in the eggs, one at a time, ensuring each is fully incorporated before adding the next. Stir in the vanilla extract. The mixture should be lightened and creamy.
- Mix dry ingredients: In a separate medium bowl, whisk together the gluten-free flour blend, baking soda, and salt. Make sure it’s really well combined.
- Combine wet and dry: Gradually add the dry ingredient mixture to the wet ingredients, mixing on low speed (if using an electric mixer) or by hand with a spatula until just combined. Do not overmix! Overmixing can lead to tougher cookies.
- Stir in chocolate: Fold in your chocolate chips or chunks until they are evenly distributed throughout the dough.
- Chill the dough: Cover the bowl tightly with plastic wrap and refrigerate for at least 24 hours, preferably 48 hours. This step is non-negotiable for the best results. Seriously, it’s worth the wait.
- Preheat and prep: When ready to bake, preheat your oven to 375°F (190°C). Line baking sheets with parchment paper or silicone mats.
- Scoop and bake: Scoop dough balls (about 2-3 tablespoons each) onto the prepared baking sheets, leaving about 2 inches between them. If desired, press a few extra chocolate chips onto the tops of the dough balls for that bakery-style look.
- Bake: Bake for 10-14 minutes, or until the edges are golden brown and set, but the centers still look slightly soft. The exact time depends on your oven and cookie size. For perfectly gooey centers, err on the side of underbaking slightly.
- Cool: Let the cookies cool on the baking sheets for 5 minutes before transferring them to a wire rack to cool completely. Sprinkle with a tiny pinch of flaky sea salt while still warm, if you’re feeling fancy.
Troubleshooting & Tips for Cookie Nirvana
Even with the perfect recipe, baking can sometimes throw a curveball. Here’s how to hit it out of the park every time.
- My cookies are spreading too much! This usually means your dough wasn’t chilled enough, or your oven temperature might be a little low. Make sure to chill for the full recommended time. You can also try chilling your scooped dough balls for an extra 10-15 minutes before baking.
- My cookies are too crumbly! This often points to not enough binder (xanthan gum) or over-baking. Ensure your GF flour blend has xanthan gum, or add it as directed. Pull them from the oven when the edges are set but the centers are still soft.
- My cookies are dry! Again, over-baking is a common culprit. Also, ensure your eggs are room temperature, which helps them emulsify better with the fats, leading to a moister cookie.
- Cookie Variations: Feel free to experiment! Add chopped nuts, a sprinkle of cinnamon, or even some candied ginger. The base recipe is robust enough to handle a little creativity.
- Storage: Store cooled cookies in an airtight container at room temperature for up to 5 days. They stay wonderfully soft! You can also freeze baked cookies for up to 2 months. Just thaw at room temp.
Making delicious gluten-free food isn’t just about avoiding certain ingredients. It’s about finding new ways to create incredible flavors and textures. This recipe is a testament to that philosophy, proving that a gluten-free lifestyle doesn’t mean sacrificing any of life’s truly great pleasures. So go on, get your hands a little messy, fill your home with the smell of warm cookies, and remind yourself that an amazing gluten-free life is absolutely within reach. You deserve every single chewy, chocolatey bite.
For more great tips on understanding what goes into your food, you might find this Wikipedia article on gluten-free diets helpful. And for insights into the science behind baking, specifically how different ingredients react, take a look at resources like this Oregon State University Extension article on baking tips. Happy baking, everyone!